analytics & adsense

Monday, October 29, 2018

Spaghetti Meat Sauce in Instant Pot

The catch with good spaghetti is in the sauce and you have to simmer it low and slow for HOURS to get that Italian Grammy feel! I have loved Italian food all of my life and I can't blame that on any ancestry I'm just a pasta junkie. So I spent years perfecting my meat sauce recipe to what it is now and the only thing that ever differs is which SURPRISE VEGGIE I'm sneaking in for my kids! hahahaha!
So what this recipe entails is making the sauce in an instant pot, combining both ground beef and sausage, several herbs and spices and cooking it low and slow! The best way to cook almost anything actually!


Here's what you'll need:
INGREDIENTS:
1 lb of ground beef
1 lb of ground sausage (any flavor you like)
1 large can of prepared spaghetti sauce (any brand, traditional/plain flavor is best, I use Ragu)
3 small cans of tomato sauce
2 cups of water
4 tsp of garlic powder
3 tsp of onion powder
2 tsp of pink Himalayan salt (link)
4 tsp of black pepper
2 tsp of Avocado oil (link)
1 package of spaghetti noodles
1/2 cup of diced onion (any color)
1/2 cup of diced bell pepper (any color)
2 garlic gloves diced
1/2 cup of any veggie diced (I usually go with squash, zuchinni or something with a very mild flavor)
2 tbsp of butter
1 cup of cheese (either mozzerela, colby jack or any type you prefer)
1/2 cup of Ricotta cheese (optional, if you prefer a creamier sauce)

INSTRUCTIONS:


-Dice your onion, pepper, garlic cloves and surprise veggie into small pieces and put in a sauce pan with the 2 tbsp of butter and caramelize them. You want to cook them on about a 7 heat for 3-5 minutes, don't burn them.


-Add your ground beef and sausage both at the same time to the caramelized veggies, add 1 tsp of salt, 2 tsp of pepper and the 1 tsp of Avocado oil to the meat mixture and break up and cook down the meat mixture.


-After the meat mixture is cooked through, add your can of prepared spaghetti sauce, all your tomato sauce cans and give it a good stir. Then add 1 tsp of salt, 2 tsp of black pepper, 4 tsp of garlic powder and 3 tsp of onion powder. Let this combine and simmer on the stove top at about a heat of 5 for maybe 10 minutes.


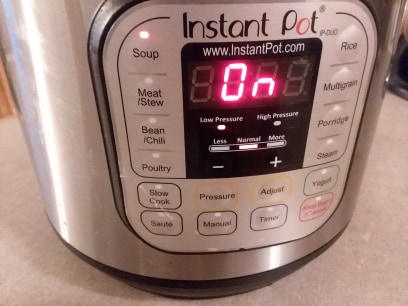
-Pour your meat spaghetti sauce into your instant pot and put it on the "stew/meat" setting for 5 hours, adjust it down to the lowest pressure and turn your pressure valve to sealed.


-Once the timer goes off on your Instantpot, start your stock pot of boiling water for your noodles, add 1 tsp of avocado oil to help the noodles separate as they cook and get that turned up to high to bring it to a boil.


-While you're waiting for the noodle water to come to a boil, open your Instant Pot, give it a good stir and add in 2 cups of water, stir it again and then add your 1 cup of cheese of your choice. Mozzarella makes a good compliment to the tomatoes but so does Colby jack and I've tried Gouda in it as well and it was nice! If you want to go for a creamier sauce (less chunky and meaty) you can add 1/2 a cup of ricotta cheese to the sauce at this point as well.


-Put the lid back on the InstanPot and put it on the "stew/meat" setting again and set it for 15 minutes.
-Once your water comes to a boil add your noodles and cook based on package directions, usually 8-10 minutes, pulling the noodles apart and stirring them around every 2-3 minutes. Once done, drain the water off the noodles. Then put them in a big bowl with 1 tsp of butter and stir them around to let the butter coat the noodles.
-Open up your InstanPot when done, stir your sauce and give it a TASTE before you do anything else. At this point you might want to add a touch more salt, pepper, garlic powder or onion powder. Make it however you like it. Once you feel it's perfect you can serve up your spaghetti in separate or combined, in whichever fashion you choose! Enjoy!!!


xoxo,
Elizabeth
#spaghetti #spaghettirecipe #gramasrecipe #instantpot #instantpotrecipe

Thursday, October 25, 2018

Home at last!

For years now I dreamt of moving back home to Arkansas and not only starting life over but living my remaining days in a place so full of greenery and nature and peace, that I could just barely stand it. And once we moved to Arkansas in November 2017 we found ourselves in Blytheville, in an urban area, at my Mom's house during our transition!


We had a few bumps along the way, we were in an urban hilly area in Pocahontas for about 4 months. We had planned to purchase that house because we just couldn't find anything else to buy in the hill land, in the area that I love where most of my family lives. It's very rural, full of farmers and country people and old Fords and more cows than you can count. But due to its size, there just isn't ever hardly anything for sale. And most land you could find would be an acre here or there or...200 acres! The home for sale were either way too much or not on enough land, there was always something that wasn't working out. And when it comes to accomplishing life goals, I can be semi-inpatient...especially when I'm currently sitting in a situation I'm unhappy with and wanting to get out of.


Well the way the cards fell; my marriage fell apart and right at the same time as that was happening we were sitting on the brink of financial ruin, unable to find a solution to hardly any of our problems, be that together or us apart. Then one day I heard about a rental house a friend had in that perfect small town where I wanted to raise my boys, in the right school district and it sat on 2 acres with 12 behind I could also lease. We went to see it and I fell in love. At the time I wasn't even thinking about it being a house for us, we weren't considering moving. As a few weeks went by, the idea of this home came up again and I strongly considered it. I talked to the owner and we made some plans. Within a couple of weeks we were moving. The move alone would save us about $1200/mth and that was the break we needed. It also put me 4 miles from most of my family and the boys in the school I moved them here for. So in many ways it was a win win.


But what really pressed upon my soul that I want to share in this post...is the people! The people came out of everywhere to welcome me, help me and maybe to them they were just saying hi but for me it was something I needed. It was almost like a confirmation in my soul that I had made the right choice. People stopped by to bring us veggies from their garden, they stopped by randomly to say hi, they helped us move, they helped me fix things! There for the first 2 weeks they were random people, family and friends, stopping by my house daily! It was absolutely refreshing! Put that on top of being blessed with a gorgeous eastern view of the sun rise every morning, surrounded by so many huge OLD oak trees (my favorite), the home feeling safe and cozy and I was and still am on cloud 9 and feeling beyond blessed.


The situations or circumstances that lead us to this place were anything other than beautiful and grand and they sure didn't involve great choices...mistakes were made, feelings were hurt, lives were changed...but here we are. And when you get to a beautiful place in life it's important to acknowledge everything it took to get here. The nights I sat and cried feeling hopeless and confused, not knowing how I was going to save my family. The days spent worrying about how I was going to pay this or that bill, longing for my life in the country. It all lead me down this path that lead me to this beautiful little home in the country side, rolling hills of pasture, neighbors with chickens and gardens and a beautiful spot to call my own until life takes me in another direction again.
Xoxo,
Elizabeth
#lifelongdream #goals #mistakes #thecountrylife #myfuturefarm #our2acres #arkansasozarks

Monday, October 22, 2018

Homemade Dog Food Recipe, for $6 a week!

Fur babies are very important to many people who have them! Some people just have their outside farm or huntin' dogs while others keep their dogs inside and spoil the tar out of them! I fall into both of those categories as we have an indoor yellow lab who sleeps with me, runs errands with me and travels with our family! And then we have a basset hound outside who is an outside dog, she's our alarm and Riley's dog!


No matter where your dog lives, if you're looking to make sure you're giving them as healthy of a diet as you can, then I've got a recipe for you! I've been making this homemade dog food for years and it's a good enough quality that it could just be "people food", it closely resembles the inside of chicken pot pie! But I use it to supplement and give it WITH their bagged, store bought dog food to give them added carbs and protein! They love me for it and it only costs me about $6 per week, sometimes cheaper if you can catch chicken on sale! So let's get to the recipe!

If you don't have an Instant Pot yet but have been thinking about getting one you can find it on Amazon right here --> https://amzn.to/2CYLhl0

 INGREDIENTS:
4 chicken leg quarters
1 lb of rice (preferably wheat, unrefined)
6-8 cups of water
1 tsp of Avocado oil (this oil isn't cheap but it's a super clean, healthy fat and worth the cost! You can find it on amazon here: https://amzn.to/2CY7TBY )
1 tsp of salt; I use pink Himalayan salt, you can find it on amazon here: https://amzn.to/2PMaxgT
2 tsp of black pepper
2 tsp of garlic powder
1-3 cans of any canned veggie you can find on sale that your dog will eat

COOK TIME: About 2 hours.

INSTRUCTIONS:
-Put your chicken leg quarters in an Instantpot, add salt, pepper, garlic powder, the rice and then cover with water until the chicken is almost covered but not entirely. Put the instant pot on the "meat/stew" setting for 90 minutes. Change the valve to seal the pressure. This will cook your chicken and rice both perfectly.
-When the timer goes off turn the valve to release the pressure and wait 5 minutes. After the 5 minutes open the Instant pot and your rice should be perfect, your chicken cooked and falling off the bone and a tiny bit of liquid left in the pot.
-Pull out your chicken pieces and put onto a plate so you can remove all the bones. I save all the bones and put them in a small pot to simmer on the stove in water for an hour or two to make homemade chicken broth, or you can just discard them.


-Put your chicken back into the instant pot, add your canned veggies (strained) and then add water up to the 10 cup line on the Instant pot and put the lid back on. Put it on the "meat/stew" setting again but just for 20 minutes and turn the valve back to seal it.


-When the timer goes off this time, change the valve to open it and wait another 5 minutes. Then your recipe is complete! I store this is an airtight container in the fridge up to 7-10 days and serve about 1 cup at a time mixed into my dog's food bowls once a day.

Xoxo, Elizabeth

#littlefarmbigdreams #dogfood #homemadedogfood #dogfoodrecipe #recipe

Monday, September 10, 2018

The best "How to Work from Home" eBook!!!


I did it! I poured hours upon hours into a book so full of everything I have learned in the last 8 years as a Work from Home Mama, Realtor, Entrepreneur and multi-small business owner!!!


I sat down one night fueled by a desire to share everything I had learned but wasn't sure exactly where to start. As I started typing it all just flew right out of me onto the computer screen, it barely felt like any effort at all. My late grandmother told me when I was 12 years old that I was going to be a writer one day. I have been writing on a semi-professional level for about 10 years now but had never approached writing my own book. Besides, what do you bring the world? 

Well I found it! Ironically, as long as I've been self-employed and through all the journeys that has brought me, I never thought about this being a teachable part of my life until a friend pointed it out saying it was what she admired most about me; the ability to grow and change, adapt, rebrand, learn a new skill and market it affectively, etc. 


You will find this book packed full of so much relevant information, I kinda sorta hope your head spins! Haha! But in a good way! I organized it and chunked it into categories that make sense, went over the top paying freelance jobs, how to write a killer resume, how to nail your pitch, how to deal with terrible clients, how to find the work, how to brand yourself, colors and methods to use in marketing and more! 

Are you looking to make an income from home? Have you dreamed of being able to put in 4-6 hours a day while your kids are at school? Maybe you need a job you can do a couple of hours a night after the kids go to bed? If you're looking for a REALISTIC way to make money from the comfort of your own home, around your schedule, owning and running your very own business...this book is for you! 

This book teaches you how to leverage the skills you already have to become a professional freelancer and how to do that to the best of your abilities! This book is crammed full of TIPS start to finish! It isn't a long read but the pages are packed with 12,200 words of wisdom based on my many years of trial & error, as well as my successes! 

If you love the book and are looking to join a community of fellow Mom bosses for weekly update videos and inspiration, please join my Patreon community, you can do that here : https://bit.ly/2Mc4sb8


And if you're rocking your #MomBoss game and want to check out merchandise I created you can find t-shirts, mugs, totes, stickers and more here : https://bit.ly/2CBT3So


XoXo, Elizabeth


I believe in you, you can do this, you deserve it, own it! Many blessings! 

#workfromhome #freelancework #ebook #newbook #selfhelpbook #businessbook #writing #workfromhomemama


Wednesday, September 5, 2018

Canning Squash to Later Fry


This recipe calls for you to PREP squash in order to can it and it preserves it in a way that you can pull it out months later, rinse it off and batter and fry it as if it was fresh! Fried squash is my personal favorite way to eat delicious home grown yellow crookneck squash so I had to try this method of preserving it via canning!

If you prefer to learn by watching you can check out my video on this entire process HERE!

You can use this recipe and can/prep as many squash as you want so you can just double or triple the water mixture if you need to make more.

My all time FAVORITE canning Book is The Ball Complete Book of Home Canning

This recipe makes enough liquid to fill and pack 6 Quarts!

Tools:
-Mason jars (size & quantity you desire)
-Lids and rings
-Hot Water Bath Canner
-Ladle
-Canner grabber
-Rubber spatula utensil
-Clean clothes

Ingredients:
-9 cups of water
-1/2 cup of Bragg Organic Raw Apple Cider Vinegar
-1/2 cup of white sugar
-1/2 tsp of pickling salt into each individual jar

Directions:
1. Combine your water, apple cider vinegar and white sugar together in a large stock pot and bring to a boil. Once it boils for about 2-4 minutes turn the heat off under the pan.
2. While your mixture is boiling you can be cutting up your squash into thin chip like slices. Go ahead and pack these into your jars as you go. Leave 1/2 inch head space in the top of the jar and you can also use your rubber ended spatula utensil to push your squash slices down into the jar to get out any excess air pockets.


3. After your jars are full and your liquid mixture has come down from a boil, use your ladle and fill each with up to 1/4 inch head space with the liquid. If you run out of a bit of the mixture at the end spread what is left evenly amongst your last 2 jars and then fill the rest of the way with boiling hot water.
4. Put 1/2 teaspoon of pickling salt into each of your jars before you put the lids and rings on. Place lids on top with magnetic wand, screw rings on "finger tip tight" (which means screw just passed the point of resistance but not too far beyond that or your jars can break in the canning process).
5. Place jars in hot water bath canner, make sure all jars are evenly spread out on rack in canning pot and then insure that there is an inch of water OVER all of your cans after they're all added. If there isn't add enough water to cover all the jars by 1 inch.


6. Then put the lid back on your hot water bath canner and bring to a boil. Once it gets to a boil you can the jars the amount of time required by YOUR elevation. This varies all over the world so Google it and see how long you need to hot water bath can squash for your specific location!
7. Once canning process is done, carefully use jar holder to remove jars onto a clean dish towel on the counter and let them sit out overnight to come down to room temperature. After this point you can move them to long term store.


Tip: Once you're ready to have your fried squash just open the jar, wash off your squash thoroughly with water (to get the salt and ACV off) and then batter and fry just like normal! Enjoy!!!

Xoxo,
Elizabeth

I hope you loved this canning recipe! You can check out how to can pickle relish HERE!
You can see how to make the full recipe for the Pickle Relish HERE!
And if you prefer videos you can find the video on how to can Dill Pickles I filmed with my Mom a couple of years ago HERE!